Flag triggers
Overview
This topic explains how to use FeatBit's flag triggers feature, which lets you make changes to flag targeting remotely from a third-party application, like an APM tool. You can use triggers to turn flag targeting on or off.
Understanding what flag triggers do
A trigger lets you initiate flag changes remotely using a unique webhook URL. Triggers integrate with your existing tools to let you enable or disable flags when you hit specific operational health thresholds or receive certain alerts. A flag can have multiple triggers attached to multiple tools or alerts.
Triggers work by creating unique URLs to connect feature flags to third-party tools. When the third-party tool generates a specific alert, the trigger sets the flag's targeting to On or Off.
Each URL controls one action, and the URLs are distinct from each other. Subsequent requests to the flag's On URL will not change the flag's state after the initial contact turns the flag On.
Understanding flag triggers' security
Although flag triggers use public URLs, they're still a very secure way to initiate changes to your feature flags. Here's why:
- Triggers use unguessable URLs, and
- Only some people in your FeatBit project can create or modify triggers.
An unguessable URL is functionally similar to an access token in that it does not require an active connection between FeatBit and other services to work. To learn more about unguessable URLs, read Google's Unguessable URLs (opens in a new tab).
When you create a new trigger, its URL only displays once and prompts you to copy it locally. After the initial display, URLs are obscured so future viewers of the flag's Triggers tab cannot view them.
If you lose a trigger's URL, you can reset it from the trigger's bottom action area.
Creating a new flag trigger
You can create triggers for individual feature flags from the flag's Triggers tab.
To create a trigger:
- Navigate to the feature flag for which you wish to create a trigger, and click into its Triggers tab.
- Click the Add button. The "Create trigger" dialog appears:\
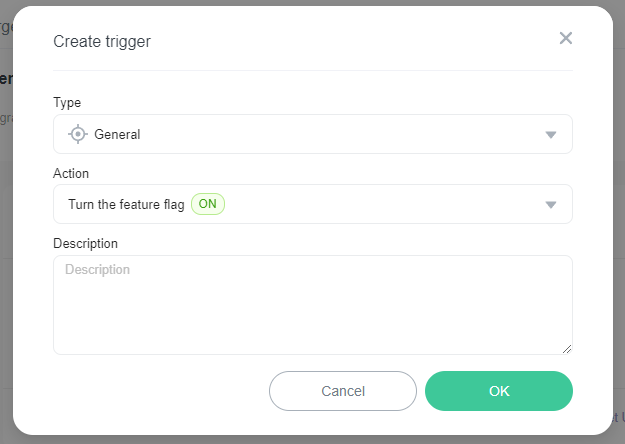
- Choose the tool you wish to use from the Type menu. You can also choose "Generic" to create a trigger that is not associated with any specific tool.
- Choose an action you wish to perform with the trigger from the Action menu.
- Click OK. A confirmation appears and the trigger appears in the flag's Triggers tab.
- Copy and save the unique trigger URL. You must do this now. After you leave this page, the trigger URL will be obscured and you will not be able to view it again:
You have created a new trigger for your flag. You can create more triggers if necessary by clicking Add.
Managing existing flag triggers
You can modify existing triggers from the flag's Triggers tab. After you create a trigger, you can disable, reset, or delete it.
To modify an existing trigger:
- Navigate to the feature flag for which you wish to edit a trigger, and click into its Triggers tab.
- Find the trigger you wish to modify.
- Choose the option you wish from the action area:
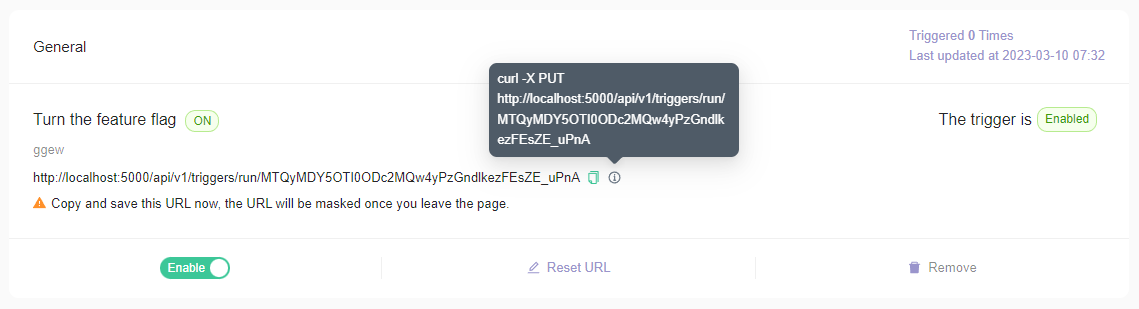
- "Disable": If you choose this option, the trigger configuration is saved but the trigger stops working. To re-enable the trigger, switch the toggle to "Enable"
- "Reset URL": If you choose this option, FeatBit generates a new URL for this trigger. Use this option if you lose a URL for an existing trigger. You must update any clients using this URL to use the new URL. Click Reset to generates a new URL.
- "Remove": If you choose this option, the trigger and its URL are deleted permanently. Click Remove to delete the trigger.
Invoke a trigger
To invoke a trigger, make a POST request to the trigger URL, no other parameter is needed. For example, with curl, you can do :
curl -X POST http://localhost:5000/api/v1/triggers/run/MTQyMDY5OTI0ODc2MQw4yPzGndlkezFEsZE_uPnA