Single Sign-On with KeyCloak
All the tokens, secrets etc. listed in this page are temporary and are for demonstration purpose only, they should be replaced with your real values.
Overview
This is a step-by-step guide using KeyCloak as an Identity Provider (IdP) and FeatBit as a Service Provider (SP) to authenticate users to FeatBit.
The final configuration should be similar to the following:
{
    "clientId": "test-oidc-client",
    "clientSecret": "tr8XwUrWo8U2wdJFb7EZ5HbqVWZEns5V",
    "redirectUri": "http://localhost:4200/login?sso-logged-in=true",
    "tokenEndpoint": "http://localhost:9000/realms/featbit/protocol/openid-connect/token",
    "clientAuthenticationMethod": "client_secret_post",
    "authorizationEndpoint": "http://localhost:9000/realms/featbit/protocol/openid-connect/auth",
    "userEmailClaim": "email",
    "scope": "openid profile email"
  }
SSO Settings
1. Run Keycloak
Run keycloak from docker and log in the admin console with admin/admin at localhost:9000 (opens in a new tab)
docker run -d -p 9000:8080 -e KEYCLOAK_ADMIN=admin -e KEYCLOAK_ADMIN_PASSWORD=admin --name=keycloak quay.io/keycloak/keycloak:22.0.1 start-dev2. Create a realm
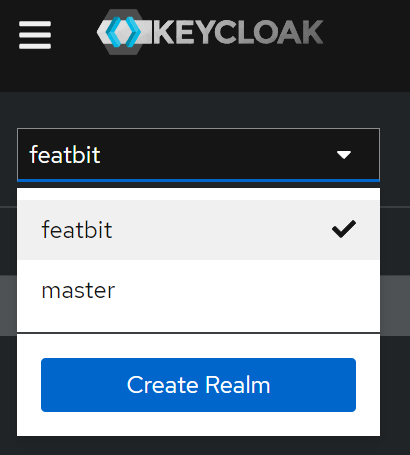
Create a new realm called featbit and switch to that realm
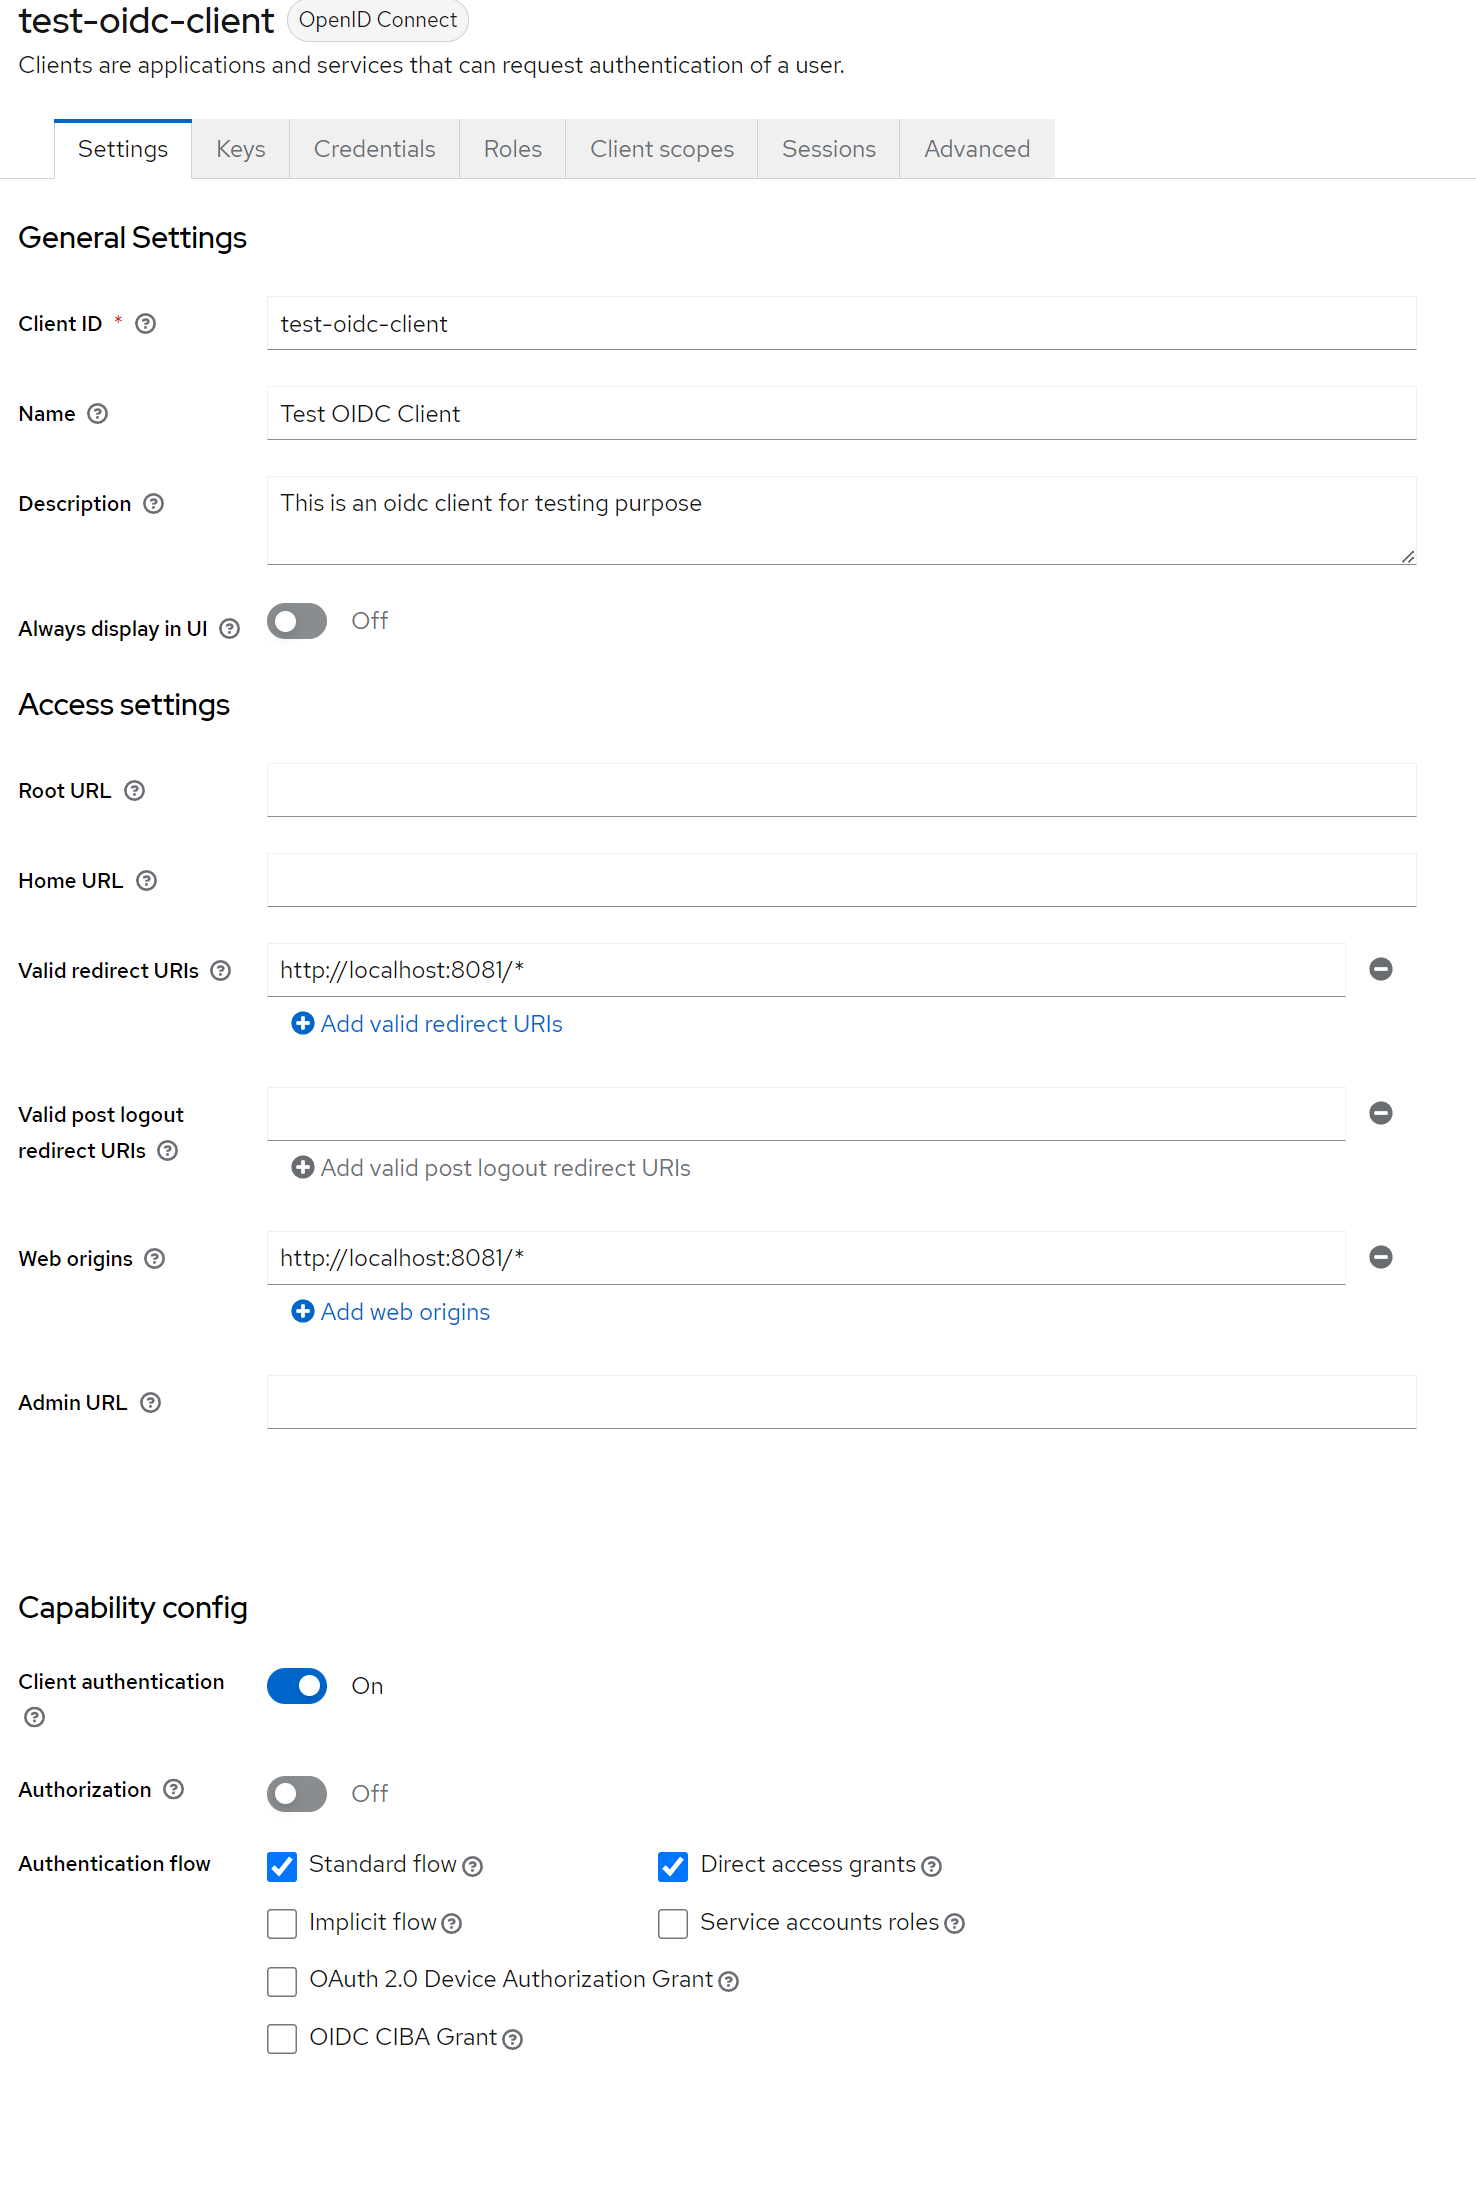
3. Create an OIDC Client
Create an OIDC client with these settings, here are some important settings:
- Set the client's Valid Redirect URIs to http://localhost:8081/ (opens in a new tab)* (FeatBit UI service address)
- Set the client's Web Origins to http://localhost:8081/ (opens in a new tab)* (FeatBit UI service address)
- Enable Client authentication
4. Create a User
Create a user on KeyCloak and set a password for that user
5. Start FeatBit
Setting the following environment variables for FeatBit Api Service in docker-compose.yml.
SSOEnabled=trueStart FeatBit and you should be able to see the SSO tab on the login page.
cd featbit
docker-compose up -d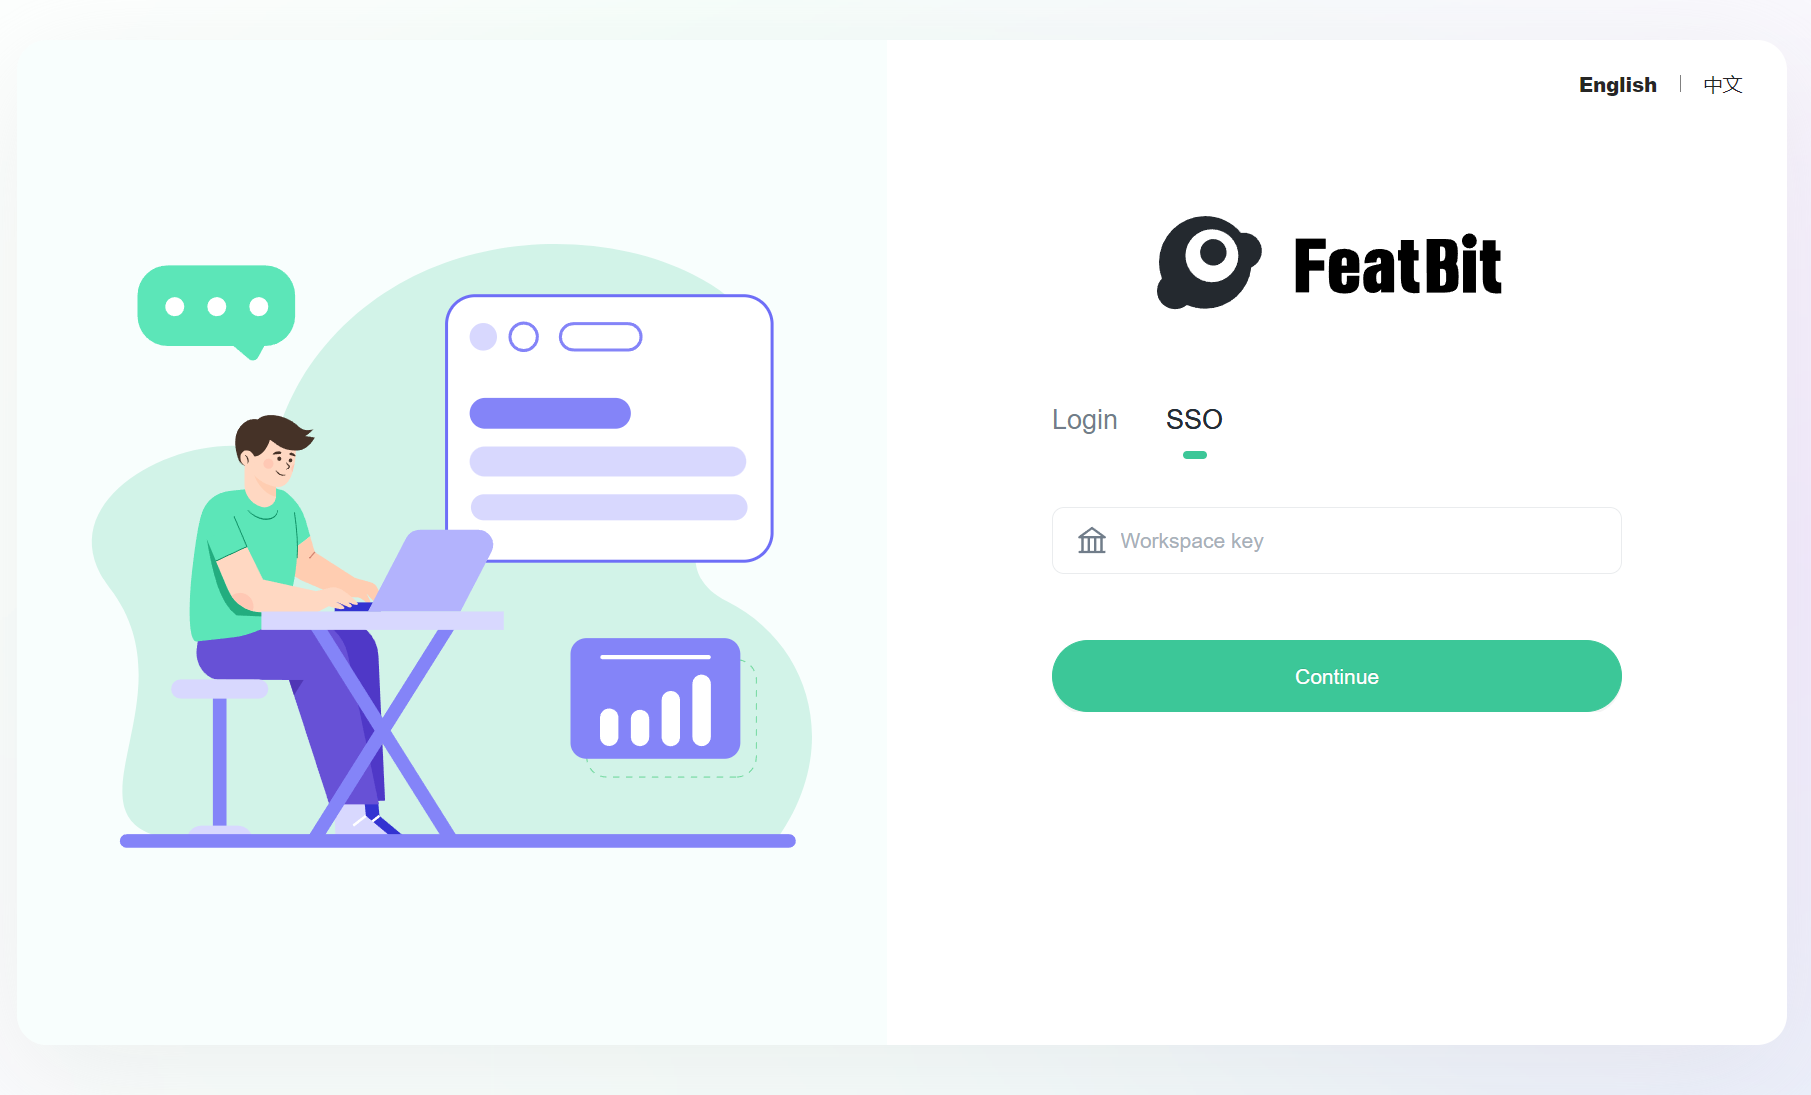
Then click the Login tab and log in with the default credentials test@featbit.com/123456
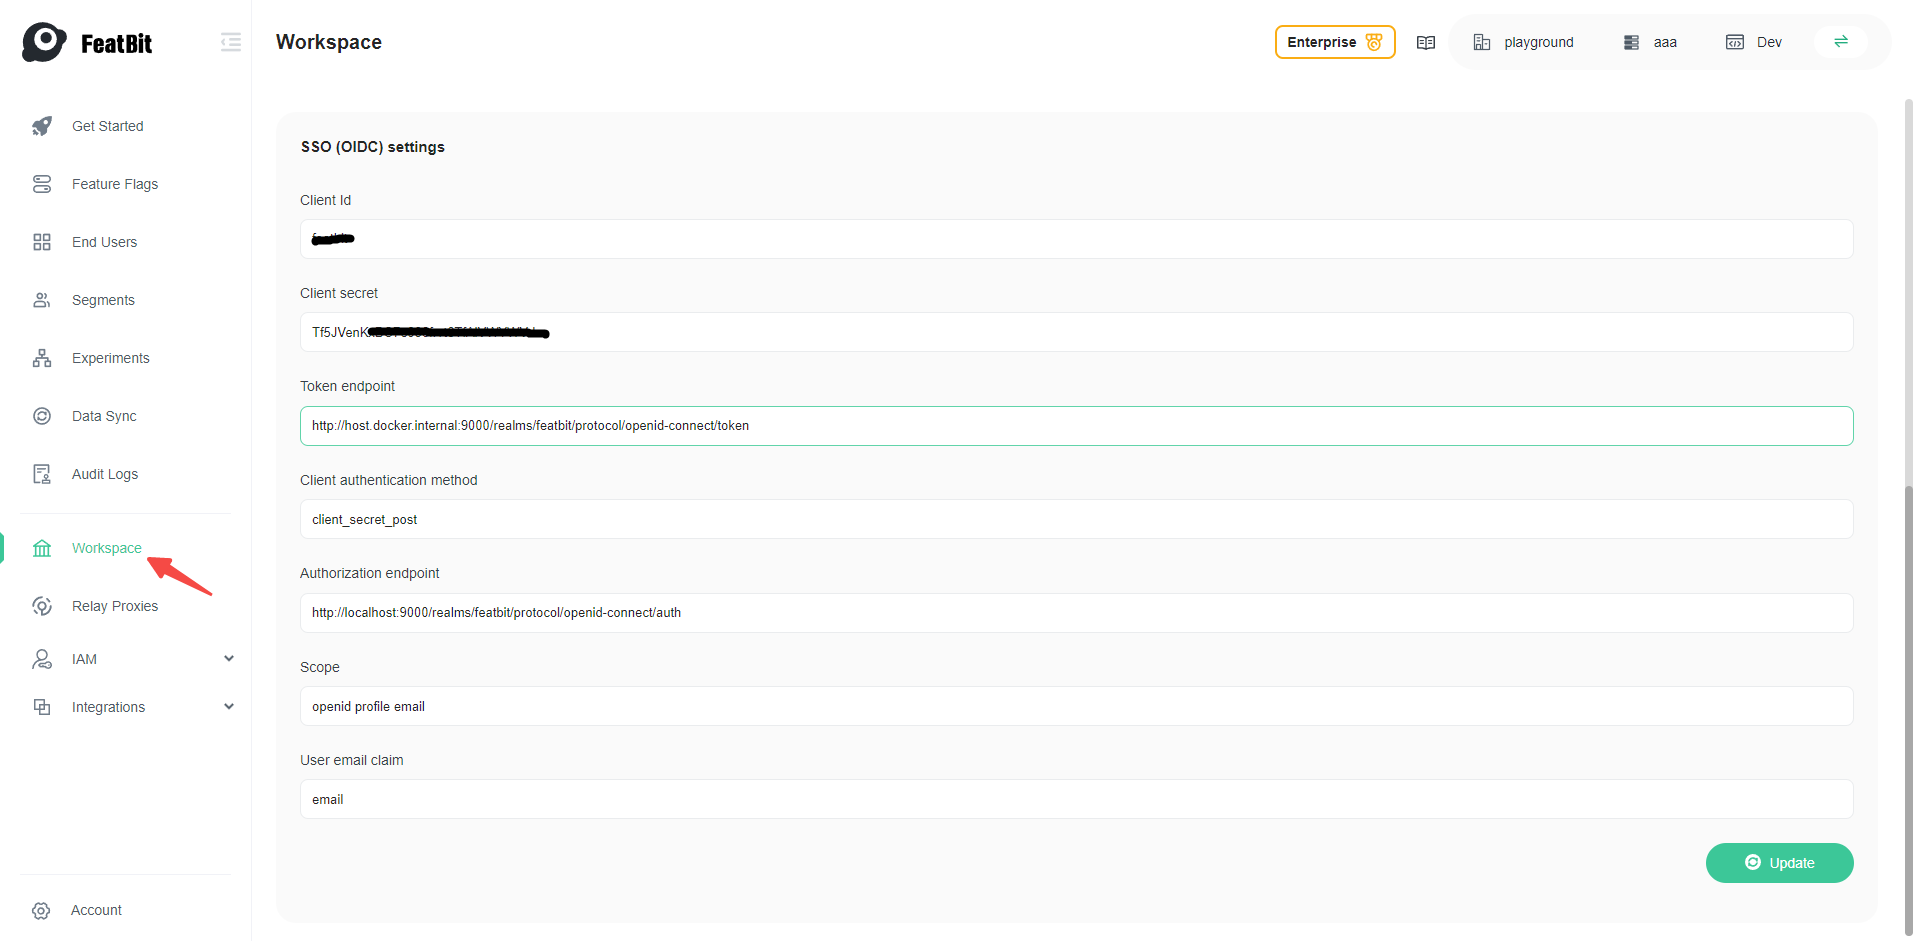
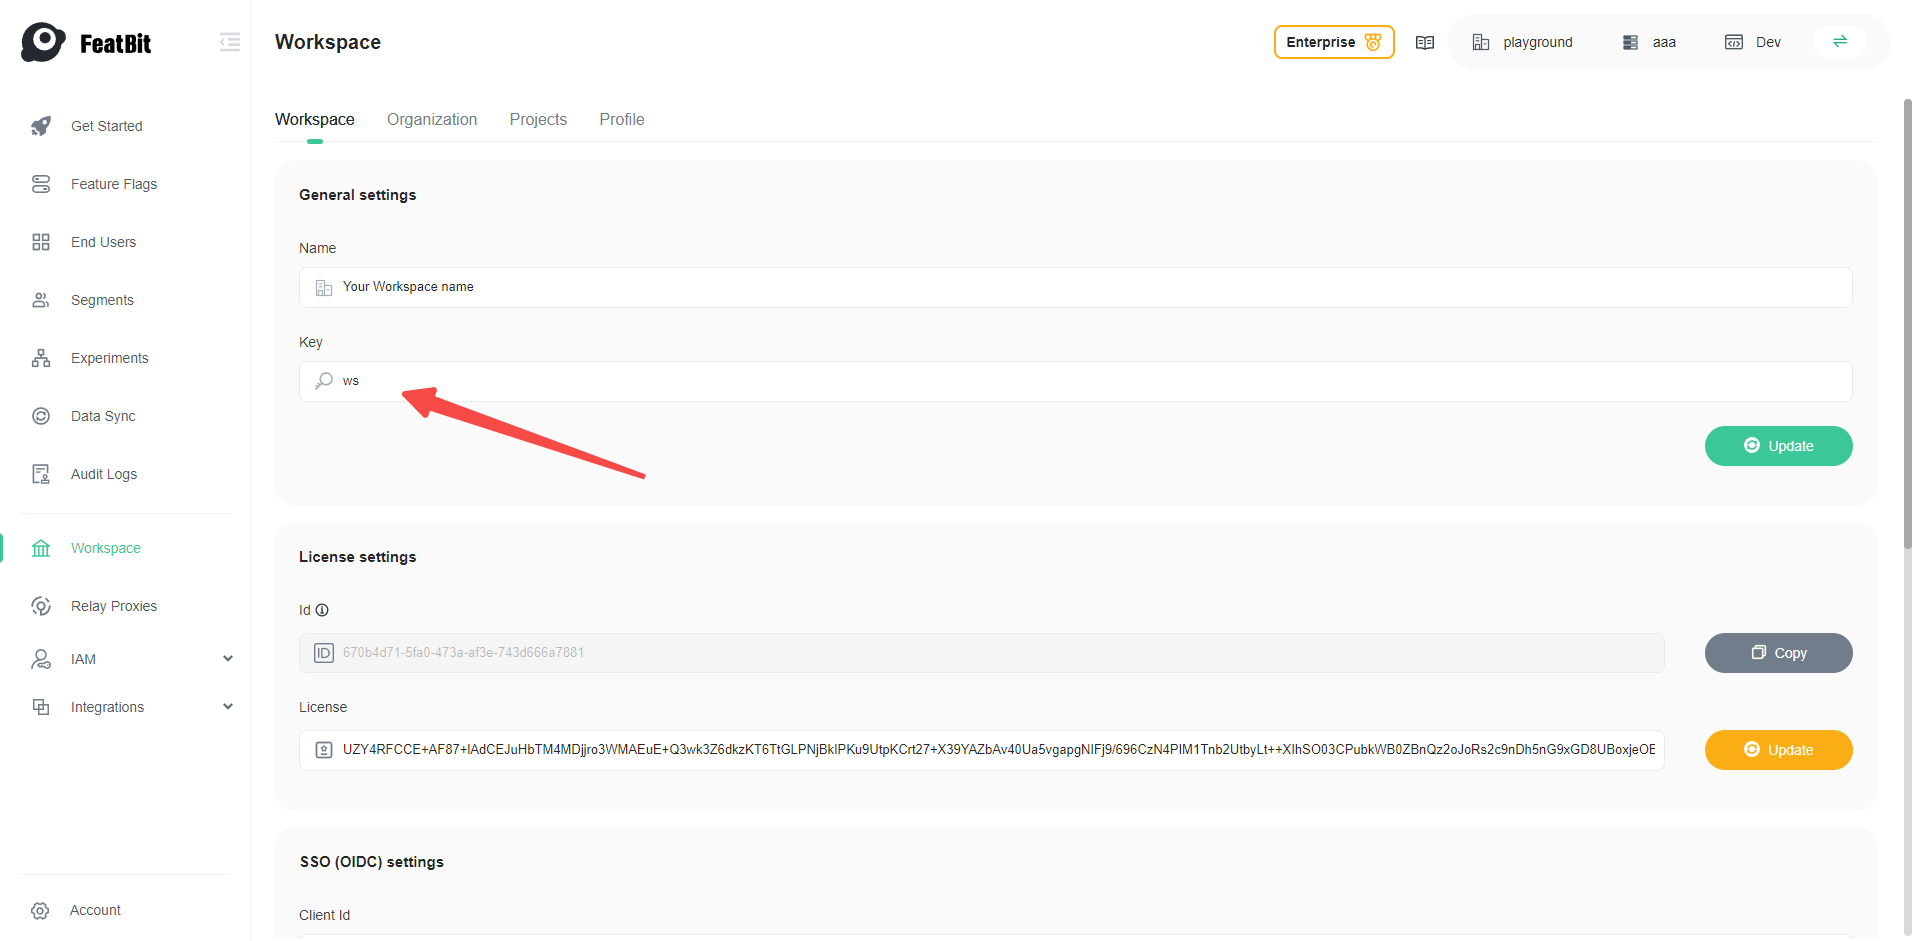
6. Configure OIDC Settings
Go to http://localhost:8081/workspace (opens in a new tab) and add your OpenID Connect settings and click on Update, please replace the client secret with your own value
7. Log In with SSO
Copy the workspace key in the General settings, you will need it when login with SSO
Log out and click SSO, use the workspace key copied earlier. Click Continue and the browser should take you to the Keycloak login page, then you can log in with the user you created previously.