Create feature flags with coding agents
Overview
Coding agents can create feature flags for you when they have access to FeatBit through either FeatBit CLI or FeatBit MCP. Use this workflow when flag creation is part of an agent-assisted development task and you want the agent to follow the same naming, ownership, and lifecycle rules that apply to the code change.
There are two recommended agent paths:
- Use FeatBit CLI when the agent can run terminal commands in the repository.
- Use FeatBit MCP when the agent environment supports MCP tools and FeatBit MCP is already configured.
Before using either path, make sure the token can access the target project, environment, and feature flag resources.
Configure access token permissions
FeatBit CLI and FeatBit MCP can both use FeatBit access tokens, but personal tokens and access tokens get permissions in different ways.
- A personal token uses the permissions of the user who created it. If that user can create feature flags in the target project and environment, the token can be used by the agent for the same operation.
- An access token has its own resource permissions. Configure the access token to include the target project, environment, and Feature flag resources before using it with an agent.
When configuring an access token with customized resources, include the feature flag resource path for the target project and environment, such as:
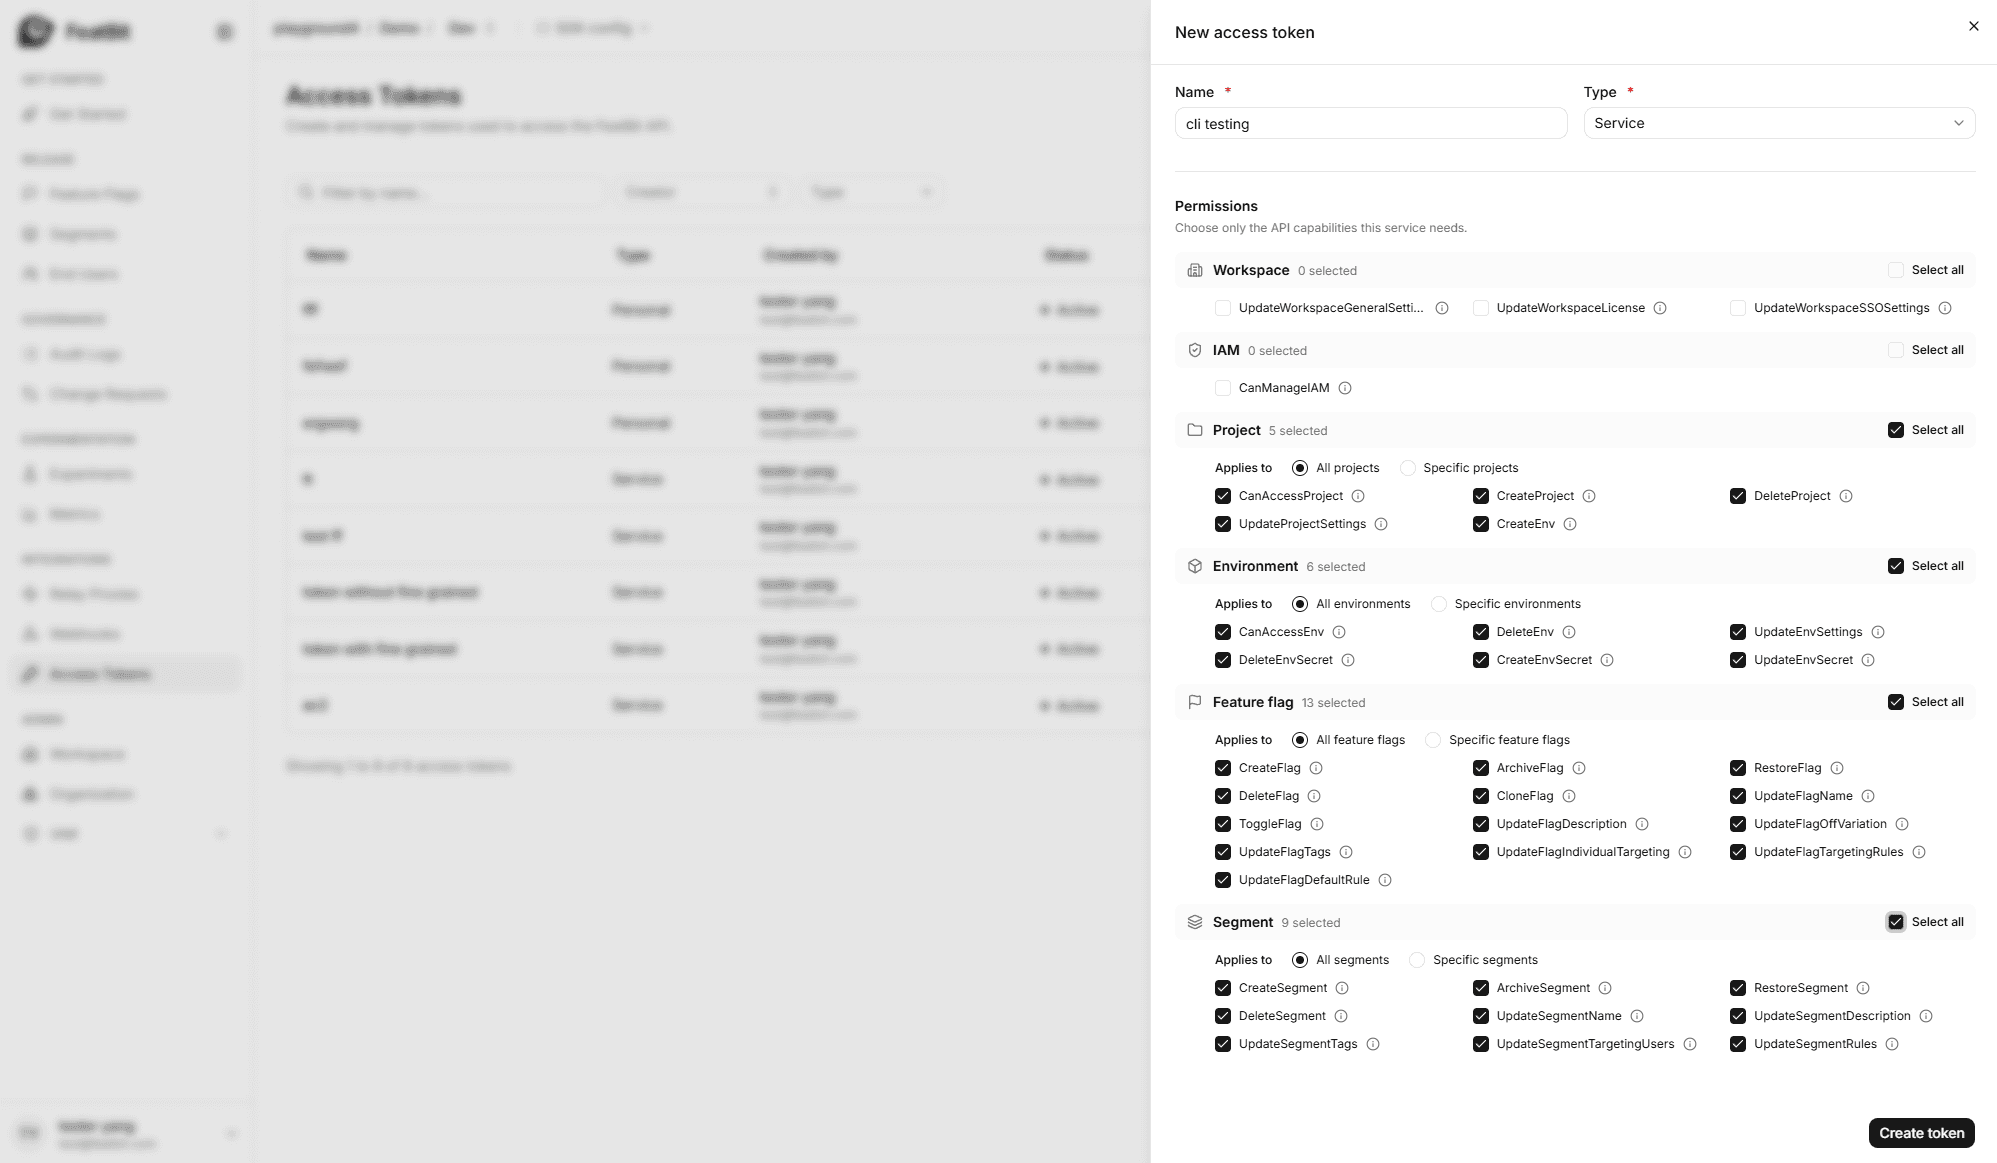
project/<project-key>:env/<environment-key>:flag/*If the agent also needs to inspect or manage segments while creating targeting rules, include the corresponding Segment resource permission for the same project and environment.
Use FeatBit CLI
Start by installing and configuring FeatBit CLI. For the latest setup instructions, refer to featbit/featbit-cli.
The agent should use the CLI when it can safely run commands and when your team wants the creation action to be visible in terminal history, pull request notes, or an agent transcript.
Create a flag with the agent
Ask the coding agent to inspect the repository conventions first, then create the flag through FeatBit CLI. A useful instruction includes the project, environment, flag purpose, expected behavior, and cleanup expectation.
Example instruction:
Use FeatBit CLI to create a release feature flag for the new checkout flow.
Project: <project>
Environment: <environment>
Flag key: new-checkout-flow
Flag type: boolean
Default off variation: false
Default on variation: true
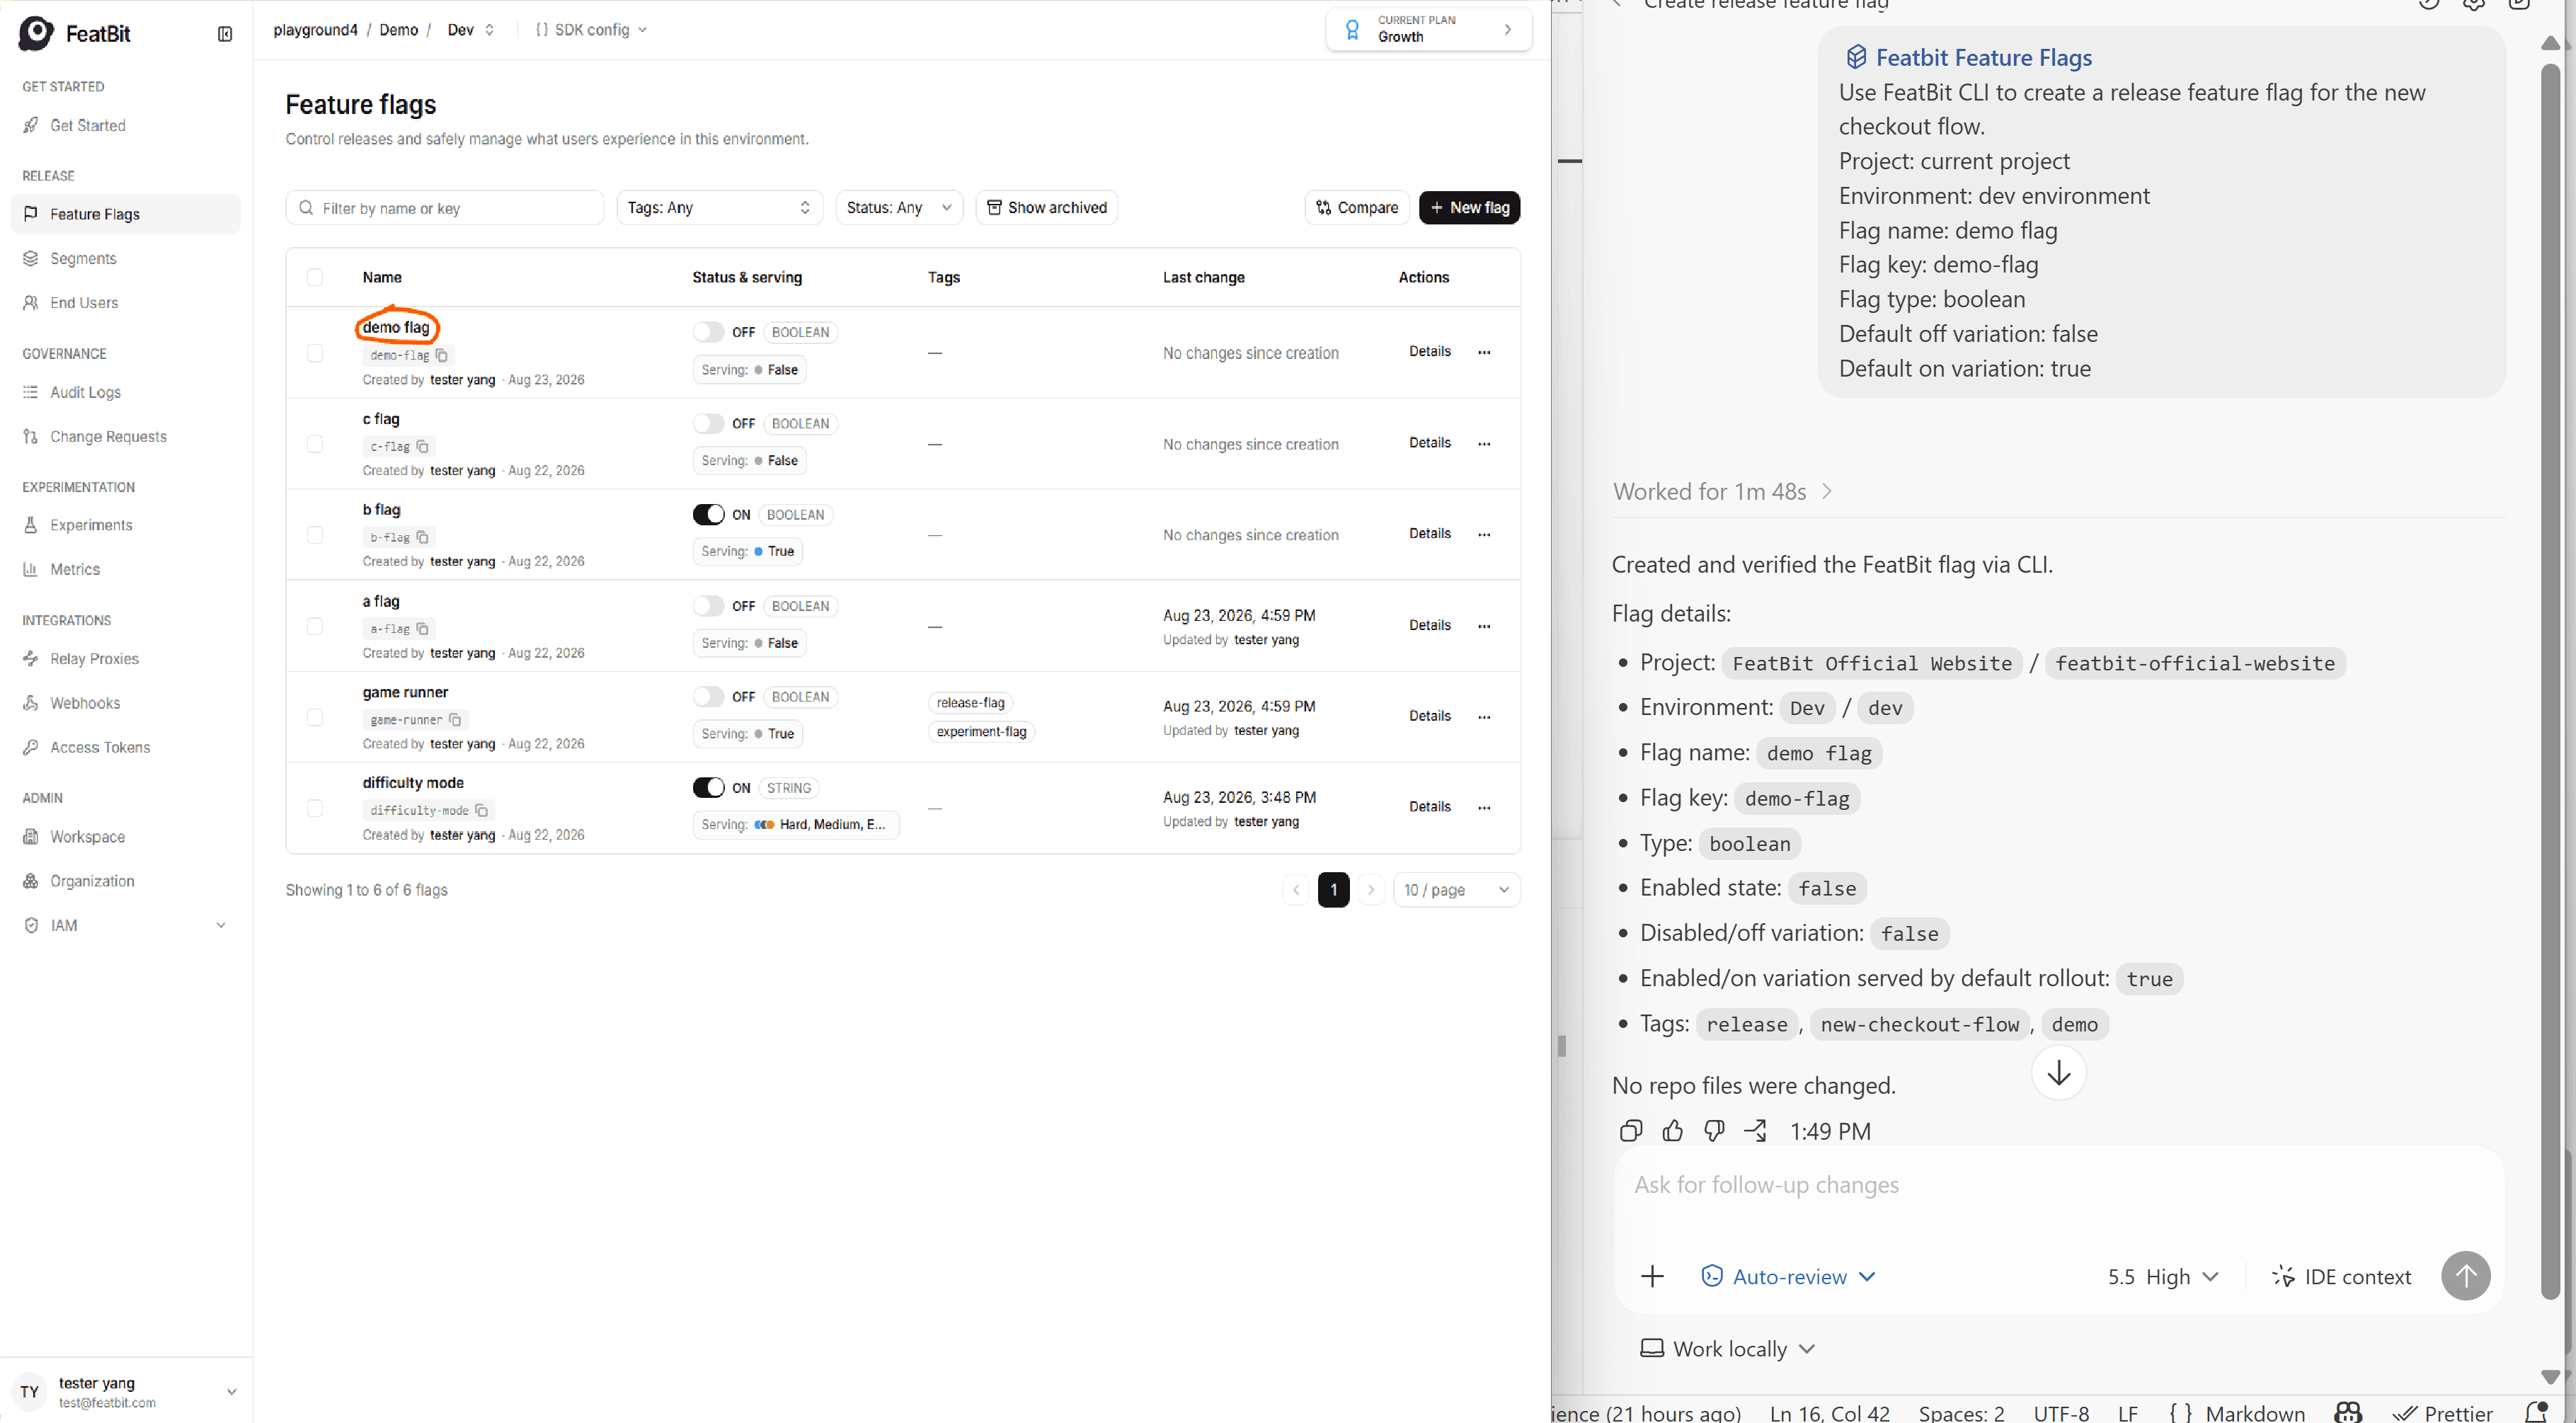
The following example shows Codex receiving the instruction and completing the CLI-based creation flow on the right, with the created feature flag shown in FeatBit on the left.
Use FeatBit MCP
Start by installing and configuring FeatBit MCP. For the latest setup instructions, refer to featbit/featbit-mcp.
After FeatBit MCP is configured, the workflow is similar to using FeatBit CLI: describe the flag you need, give the project and environment context, and let the coding agent call FeatBit MCP.
As with the CLI workflow, FeatBit recommends keeping a small project-level skill or reference, such as .agents/feature-flag/skill.md or references/featbit-mcp.md, so the team uses the same project keys, environment keys, naming rules, duplicate-check rule, and required lifecycle fields every time.